10 Best Digital Microscope For Soldering
From leading brands and best sellers available on the web.By clicking on a link to a third party's website, log data is shared with that third party.
Related Products
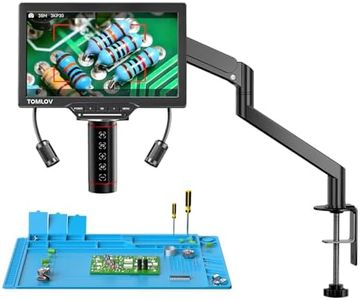
![LINKMICRO LM249MS Max 3 Lens 10.1" HDMI Digital Microscope 2000X with Soldering Workstation, Electronic Microscope for Adults PCB Repair [24 inch Boom Arm Stand], UHD 2160P Videos, Windows](https://images-proxy.bestreviews.guide/7ZivZ8Uul0gbua3lcaU373XpCpk=/0x300/https://m.media-amazon.com/images/I/41rCRryYtVL._AC_CX679_.jpg)

Buying Guide for the Best Digital Microscope For Soldering
Choosing a digital microscope for soldering can make your electronics projects so much easier and more precise. Before you buy, think about how you'll be using the microscope: Are you mostly working on tiny components? Do you need to document your work with photos or video? Making a list of your must-have features versus nice-to-have features will help. Pay attention to the technical details, but also consider comfort—like how easily you can position the microscope and whether the setup feels natural for long soldering sessions.Magnification RangeMagnification range refers to how much the microscope can enlarge the objects you're viewing. This is important because soldering often involves very small components, and you want a range that makes your work both visible and clear. Lower magnification (under 20x) gives a wider view and is fine for basic work, while higher magnification (above 50x) lets you see intricate details for precision tasks. Choose a range that matches your comfort level with working on small parts—if you mostly do micro-soldering, higher magnification is beneficial, but if your needs are general, a moderate range is often enough.
Working DistanceWorking distance is the space between the microscope lens and the subject when it's in focus. This matters because you need room to maneuver your soldering iron and tools. Short working distances (less than 5cm) make it hard to work under the lens, while longer working distances (8cm or more) give you the space you need for hands-on work without bumping the microscope. Pick a microscope that allows you enough room to work comfortably without sacrificing image quality.
Camera ResolutionCamera resolution tells you how many pixels are used to create the digital image. Higher resolution (measured in megapixels) generally means sharper pictures and more detail, which can be important if you want to take photos or videos of your work. Common segments are lower resolution (under 2MP) for just a basic view, mid-range (2-5MP) for average documentation, and high resolution (over 5MP) for very crisp images. Think about whether you need detailed images for sharing or records, or if a clear live view is enough.
Display Type and SizeDigital microscopes can have their own built-in screens or connect to an external monitor or computer. Built-in screens offer convenience for one-person work and are portable, while external displays can give a larger, clearer view for precision and group work. Screen sizes usually range from around 3 to 7 inches for built-in types. Choose based on your workspace and how many people need to see the image at once.
Lighting OptionsLighting is crucial for seeing fine details when soldering. Many digital microscopes have built-in LED lights around the lens for even illumination. Adjustable lighting lets you change brightness for different situations, preventing glare or shadows. Some models also support extra external lights. Think about whether you'll be working in various lighting conditions—having adjustable, bright lights is key for most hobbyists and professionals.
Focusing MethodFocusing can be manual or automatic. Manual focusing lets you make precise adjustments, which is highly useful for soldering because components can be at different heights. Automatic focusing is more convenient if you move objects a lot under the lens, but may not always lock onto tiny parts perfectly. Decide whether you prefer control and fine-tuning (manual) or simplicity and speed (auto), and choose accordingly.
Mounting and StabilityHow the microscope sits on your workbench—its mounting method—affects stability and comfort. Some are handheld, others come with adjustable stands. More stable, heavier stands mean less wobble, which is very important for precise soldering. Adjustable arms or stands let you position the lens where you need it. Think about how much movement you do during soldering, and look for a setup that's steady but also easy to adjust.